Making Vertex-Painted Terrain Work in Unity URP (Without Breaking Your Sampler Budget)
So here’s the thing about Unity’s URP that’ll bite you if you’re not careful: you only get 16 texture samplers total. And before you even start building your fancy terrain material, the pipeline has already claimed about 8 of them for lighting, shadows, and other essential stuff.
This became a real problem when I needed to turn a regular mesh into something that behaves like Unity’s terrain system—where you can paint different materials using vertex colors. Sounds simple enough, right?
The Reality Check
Let’s say you want a decent-looking terrain with multiple materials. For each sub-material, you typically need:
- Base Color texture
- Normal map
- Metallic/Smoothness map
- Ambient Occlusion map
That’s 4 samplers per material. With only ~8 samplers available after URP takes its share, you’re looking at… maybe 2 different materials before you hit the limit. Not exactly the rich, varied terrain you had in mind.
My First (Failed) Attempt: Texture Arrays
I thought I was being clever here. “I’ll use Texture2DArray!” I said. “One sampler per array, no matter how many slices!”
float4 albedo = SAMPLE_TEXTURE2D_ARRAY(_BaseColorArray, sampler_BaseColorArray, uv, slice);Technically true, but here’s the catch: you still need separate arrays for each type of data. So you end up with:
_BaseColorArray_NormalArray_MetallicSmoothnessArray_AOArray
Each time you sample from these arrays, you’re still using a sampler. The math doesn’t change—you’re still hitting that 16-sampler ceiling just as hard.
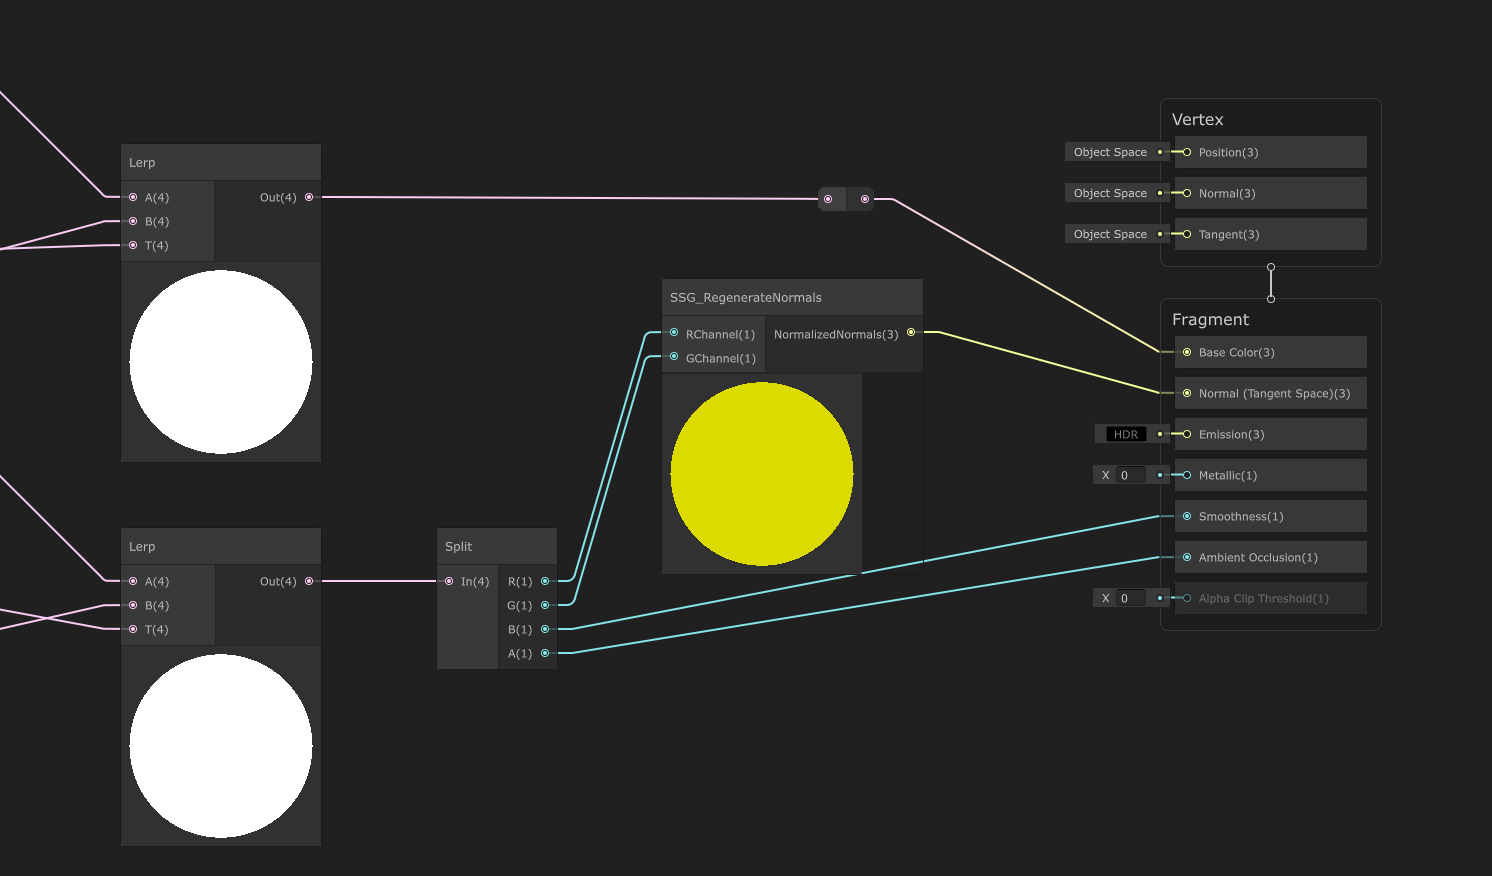
The Solution: Channel Packing (NSAO Maps)
After banging my head against the sampler limit, I realized I needed to get creative with texture compression. The breakthrough was understanding that not all texture data needs its own dedicated channels.
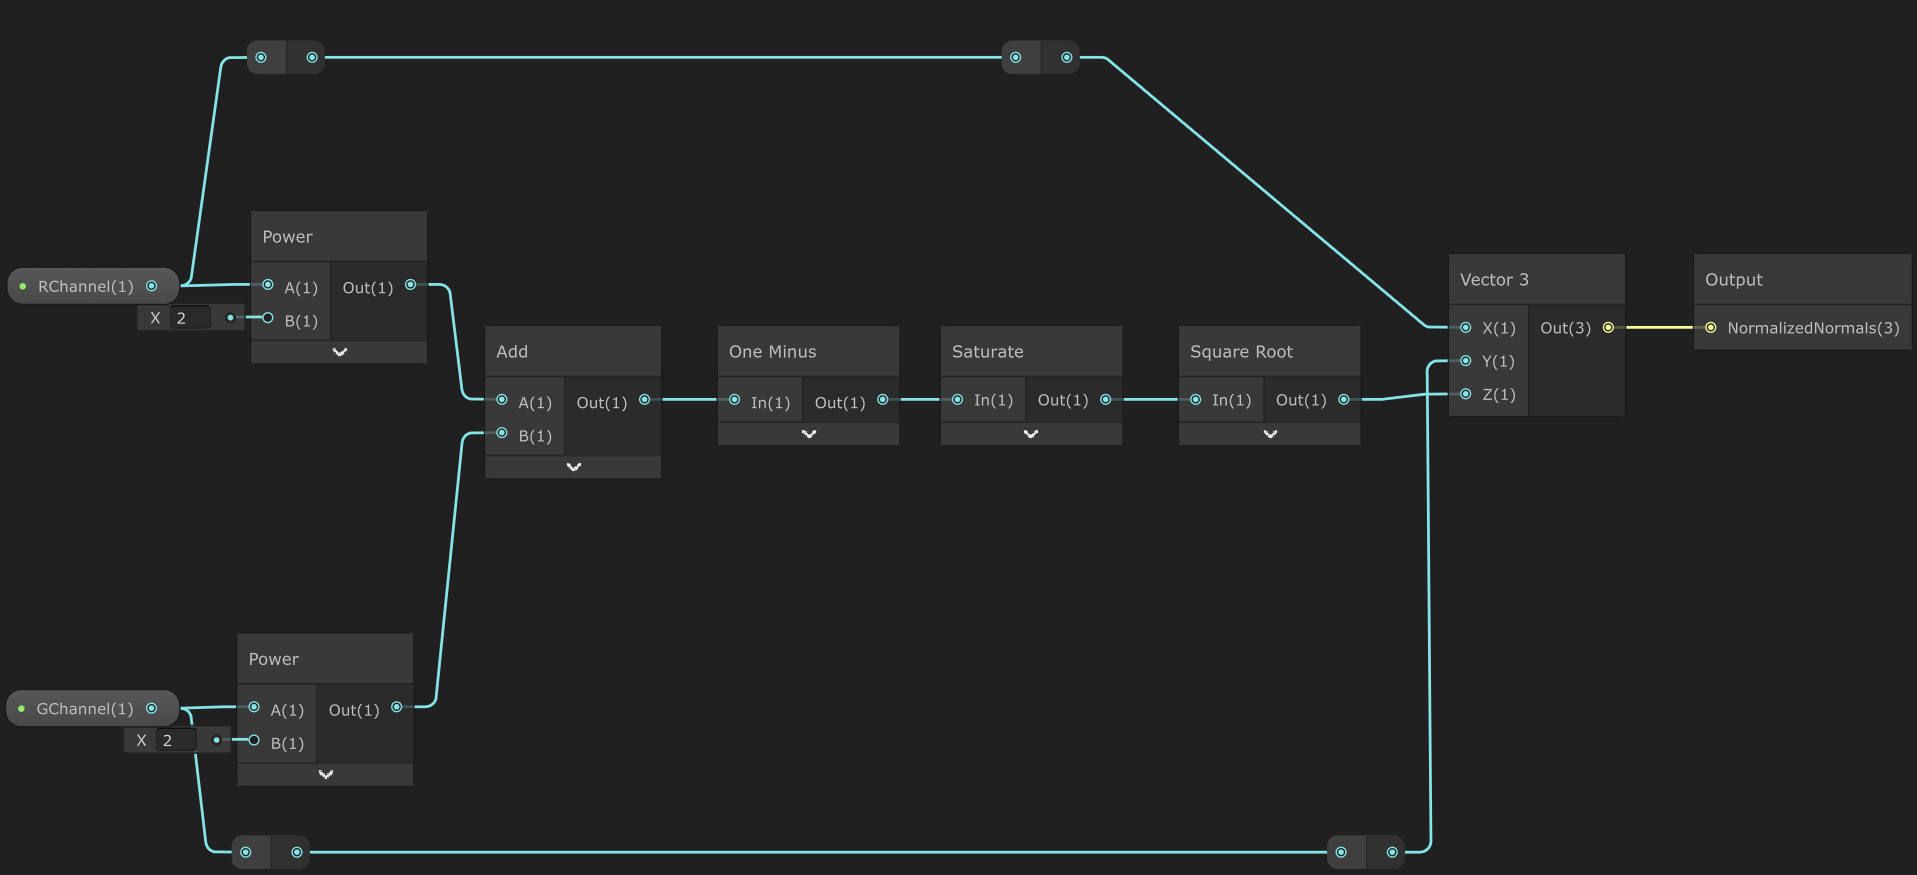
Here’s the key insight: normal maps store their real information in just the R and G channels. The blue channel (Z component) can be reconstructed mathematically in the shader. This opened up space for other data.
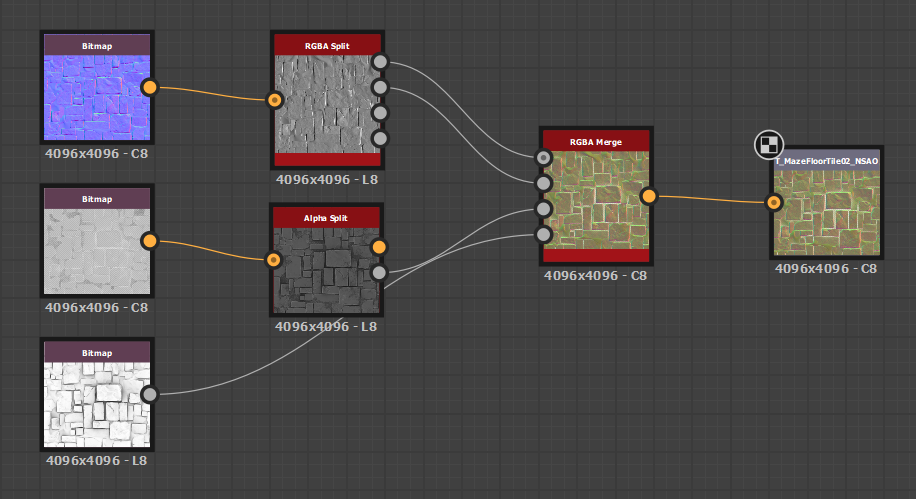
I created what I call “NSAO” textures—combining four pieces of information into a single RGBA texture:
| Channel | Data |
|---|---|
| R | Normal X (Red channel) |
| G | Normal Y (Green channel) |
| B | Smoothness |
| A | Ambient Occlusion |
The Workflow
- Gather your source textures for each material (Normal, MetallicSmoothness, AO)
- Split the channels in Substance Designer or Photoshop
- Pack them into your NSAO texture using the mapping above
- Export as TGA/PNG and crucially—disable sRGB on import (this is non-color data)
- Reconstruct the normal Z in your shader using:
sqrt(1 - (R² + G²))
This approach cuts your sampler usage in half. Instead of needing 4 samplers per material, you only need 2: one for Base Color, one for NSAO.
The Shader Setup
The Shader Graph becomes much more manageable:
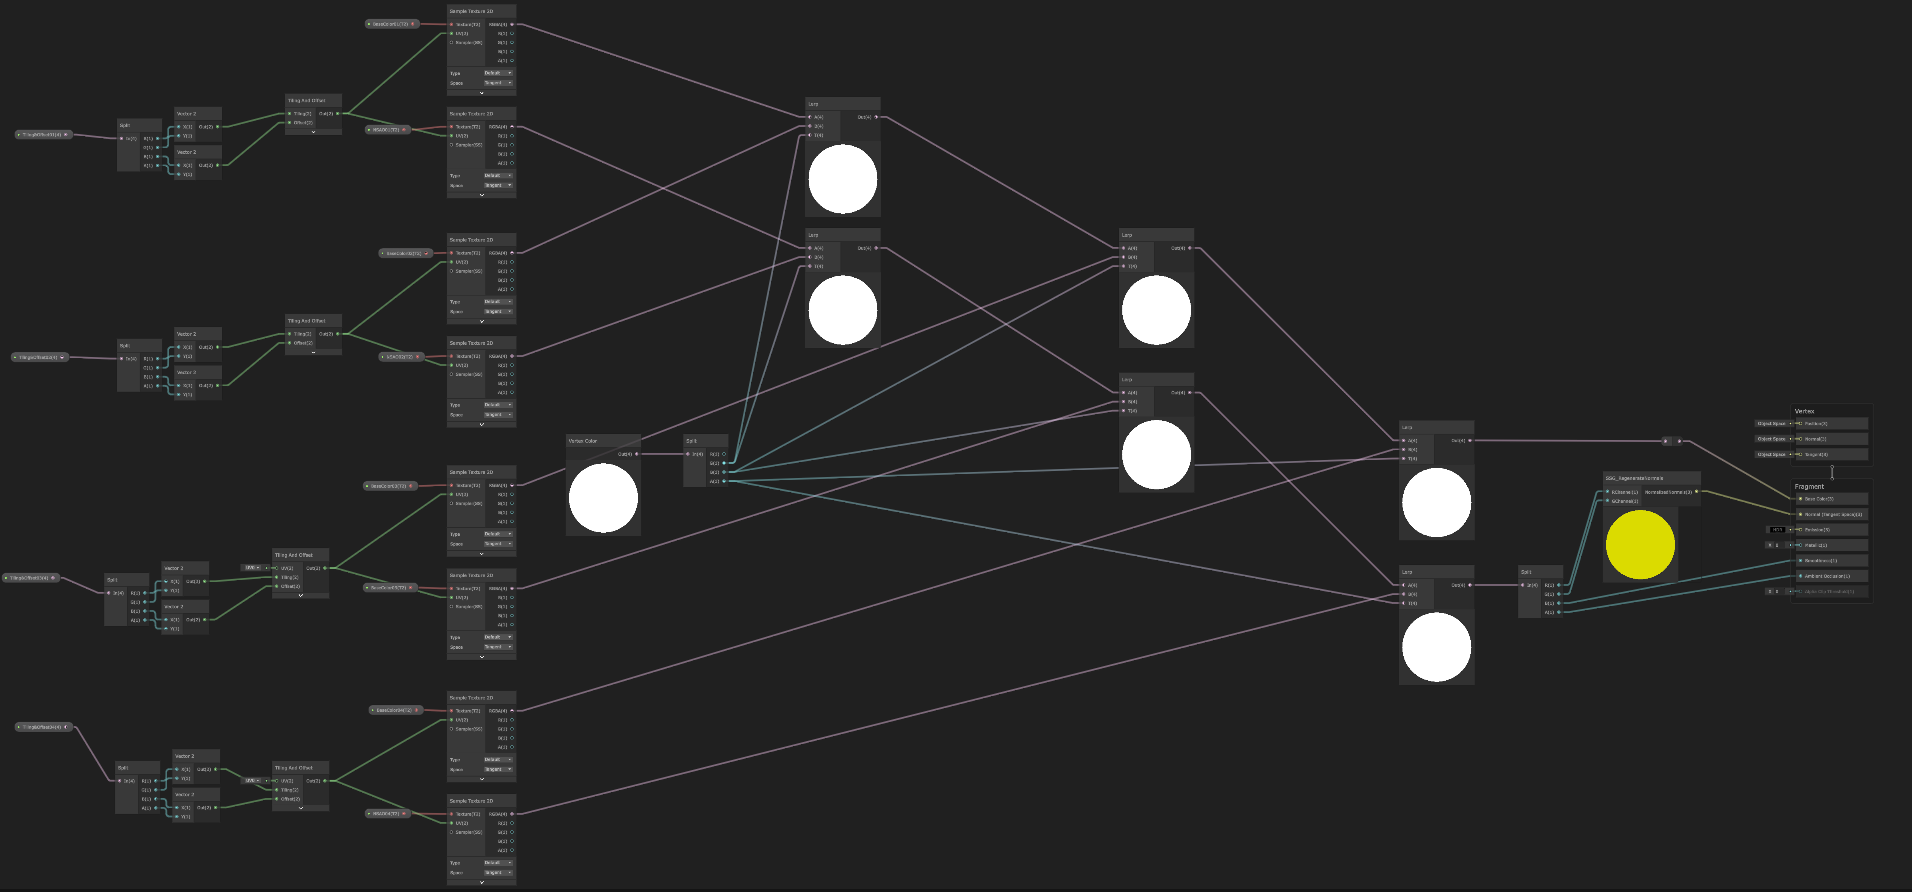
- Use Vertex Color RGB as blend weights (the fourth weight is
1 - sum) - Sample your Base Color textures (A, B, C, D materials)
- Sample your NSAO textures (A, B, C, D materials)
- Lerp everything together based on vertex colors
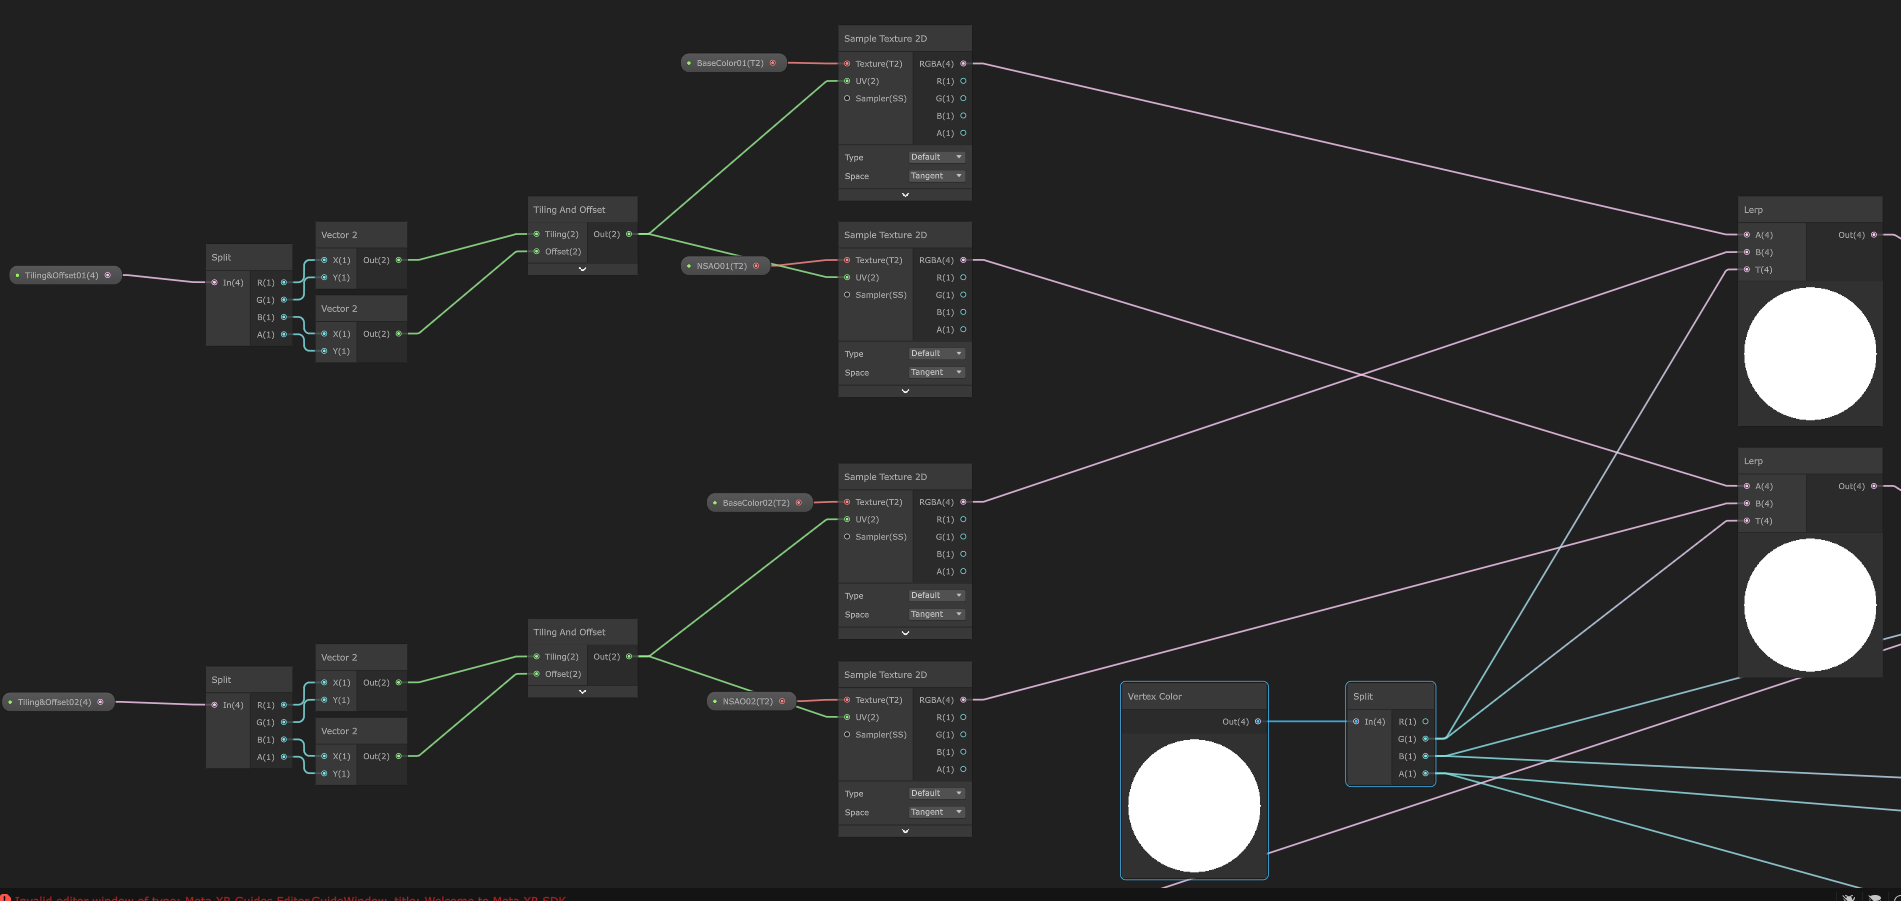
- Unpack the NSAO data
- Reconstruct normals
- Connect to the Fragment inputs
Working with Polybrush
A few hard-learned lessons about Unity’s Polybrush tool:
- Stick with version 1.1.6 if you’re on Unity 2022+. Version 1.1.8 has gizmo issues that’ll drive you crazy
- UVs are still required even though vertex painting doesn’t use them. A quick auto-unwrap is fine
- Watch those UV seams—paint transitions can reveal splits if seams run across faces
When You Need Metallic Too
If your project requires metallic values (mine usually doesn’t for terrain), you can adapt this approach:
- Move Ambient Occlusion to the alpha channel of your Base Color texture (terrains rarely need transparency anyway)
- Store Metallic in the B channel of your packed texture
- This gives you a “BAO” (Base + AO) and “NMS” (Normal + Metallic + Smoothness) setup
The Bottom Line
This channel-packing approach let me build rich, multi-material terrain without hitting URP’s sampler limits. It’s not as elegant as having unlimited samplers, but it works reliably and keeps your materials looking good.
The key is being strategic about what data really needs its own texture and what can be combined. Once you start thinking in terms of data efficiency rather than individual textures, a lot more becomes possible within URP’s constraints.
Pro tip: Always double-check your sampler count in the Frame Debugger. It’s easy to accidentally exceed the limit when you’re iterating on complex materials.